Make the perfect pot roast in your Instant Pot! This easy recipe is low-carb and grain-free, and will feed your entire family.
Pot roast is comfort food that everyone can relate to. But it takes planning and a long time to cook in the oven. But not in the Instant Pot®!
And you know what's even better? Add the veggies at the end to the almost cooked meat and now, you have a side dish that you don't even have to use another pan to cook! Who would mind not having to wash another dirty pot or pan? Not me.
This is one of the reasons why I love cooking in the Instant Pot. No extra pots or pans to wash. Read more on why you should consider Instant Pot here if you don't have one yet and see all my Instant Pot recipes here if you already have one.
Intro
Best Cut of Beef For Pot Roast
One of the best cuts of meat - and inexpensive - for a pot roast is a chuck roast with marbleized connective tissues and a little bit of fat that are weaved into the muscles.
Chuck is from the front - shoulder - of the animal so the muscles are a bit tough. But because of the connective tissues that hold the muscles together that 'melt' down, creating gelatin, it tenderizes the meat when cooked. Look for these types of roast in the grocery store:
- Chuck roast
- Boneless chuck
- Shoulder steak
The cut I used for this recipe was a thick chuck steak and not a rump. I had to cut into large pieces so they would snuggly fit inside the inner pot.
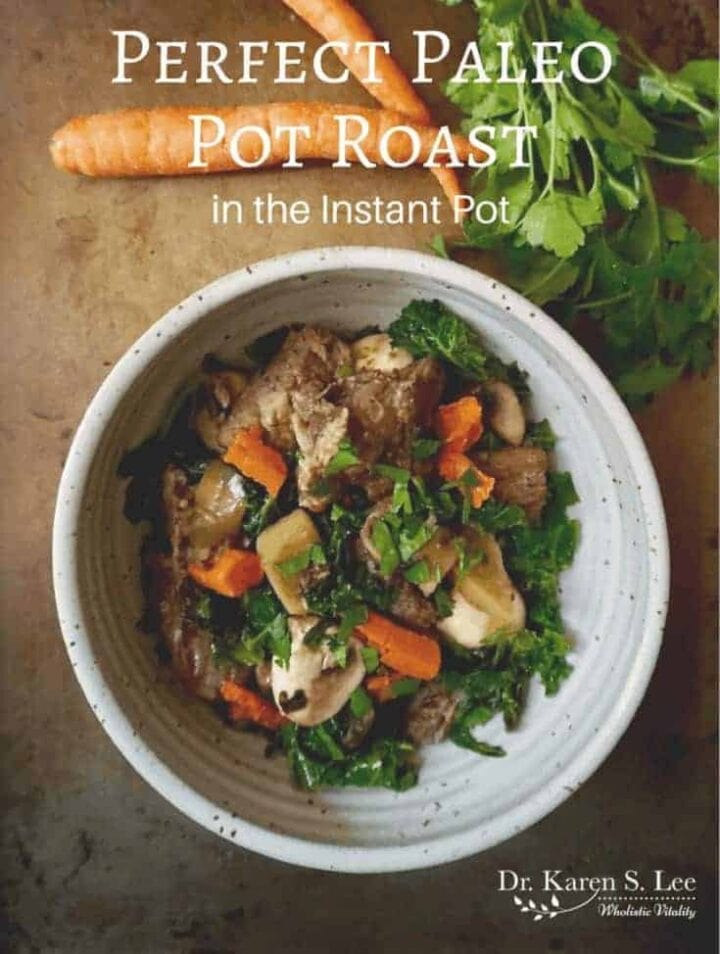
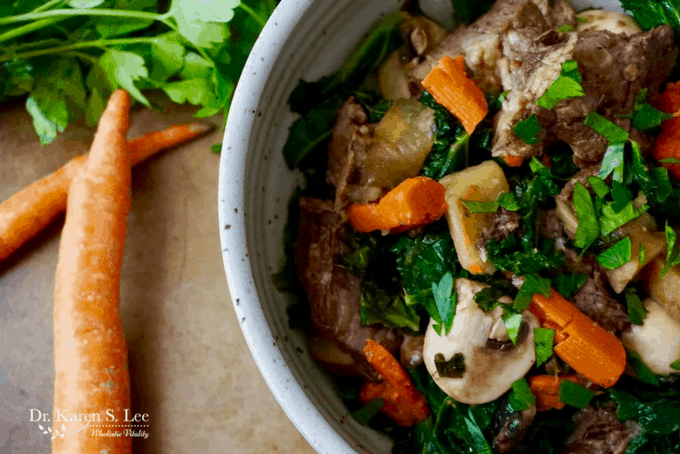
Don't be surprised if you end up with meat chunks that fall apart and melt in your mouth. As you can see in the picture, chunks of meat are mixed in with the veggies and not sliced. If you want meat slices, you can use rump or eye round but I warn you; it will not be juicy and tender.
Don't Brown The Roast First
I thought searing or browning the meat before cooking preserved the moisture so I used to sear all meats before cooking. But not anymore. According to The Food Lab, searing meats before cooking actually loses more moisture than after! Mind blown.
And since you can’t sear pot roast afterward, you don’t need to brown the meat before putting it in the Instant Pot for this recipe. That's even easier! So stop browning meats from now on. Sear/brown it afterward, which is actually called "reverse sear', for steaks and prime ribs.
Best Vegetables To Use To Keep It Grain-Free and Low-Carb
To make this recipe paleo-friendlyand to make it low-carb, I used daikon (Japanese radish that are long and white) instead of potatoes but you could use any root vegetables like these:
- Turnip
- Jicama
- Japanese white yam
- Rutabaga
- Radish
- Yucca
All of the above vegetables will be as tasty as white potatoes, if not more. It's also less heavy. Radishes will be lower in carbs so check your carb calculator to see which root veggie you should use.
Ingredients
Chuck Roast:
This is a shoulder cut. Remember to keep all the fat on it and just skim the fat after it cooks. This will make it juicier and help it be more tender in the Instant Pot.
Carrots:
To save yourself time peeling the carrots, you can use baby carrots. You just need to cut the carrots into 1-inch slices.
Celery:
Cut the celery into 2-inch pieces. Even if you don't like the taste of celery, add them to your pot roast. They will add lots of flavor to the meat.
Beef Stock:
I prefer to make my own bone broth - that includes beef stock. It's so easy and has so many more nutrients.
Aromatics and Spices:
I called the garlic and onions combination "aromatics" because they add such a wonderful aroma to my dishes. I rarely use one without the other.
In addition to garlic and onion, I also used:
- Thyme
- Bay Leaves
- Parsley
- Tarragon
- Worcestershire Sauce
- Salt
- Pepper
FAQ
Normally, all meats should be cooked with "natural pressure release" or NPR method with Instant Pot for more tender results but for this recipe, you could use quick release (QR) after 60 minutes since you'll be adding veggies at the end to be served as a side.
You can also add sauteed kale or spinach at the end if you like more greens, as pictured.
I always try to use fresh herbs whenever I get the chance. They have a lot more flavor than dried. Dried herbs and spices will work in a pinch if you don't have them fresh on hand.
Related recipes
- The Best Paleo Beef Stew In The Instant Pot
- Affordable Paleo Asian-Inspired Beef and Broccoli
- Korean BBQ Beef Kalbi Recipe
⭐️ Have you tried this recipe? If you love this recipe, give it "5 star" ⭐️⭐️⭐️⭐️⭐️ rating on the recipe card! We appreciate your feedback!
📋 Recipe
Recipe
Perfect Paleo Pot Roast in the Instant Pot
Equipment
Ingredients
- 3-4 lb Chuck Roast a shoulder cut
- 1 carrot cut diagonally into about 1 inch in length, divided in half
- 2 celery stalks cut diagonally in about 2 inches in length, divided in half
- 1 cup sliced onion
- 4 cloves garlic crushed
- 4-5 sprigs sprigs of fresh thyme or 1 tablespoon of dried thyme
- 2 Bay leaves
- 1 bunch of fresh parsley chopped with stems or 1 tablespoon of dried parsley
- 2 sprigs fresh tarragon or 1 teaspoon of dried tarragon
- 1 tablespoon Worcestershire sauce
- 1 tablespoon sea salt
- 1 tablespoon fresh ground black pepper
- ¾ cup Beef stock - not broth.
To Add After Meat is Cooked
- 15 oz Daikon about 2” thick slices
- 2 celery stalks cut diagonally in about 2 inches in length, divided in half
- 1 carrots cut diagonally in about 1 inch in length, divided in half
- 2 cups Mushrooms white button or portobello, cut in quarters
Instructions
- Pat the meat dry, rub salt and pepper on the outside and leave it on the counter for about 30 minutes to bring to room temperature.
- Meanwhile, prepare the vegetables. Cut and chop all the vegetables and divide them in half to be used separately. Reserve daikon, celery, and carrots to be added after the meat is cooked.
- When the meat is ready, plug in the Instant Pot®.
- Add half of the vegetables listed in the main section in the bottom of the liner pot evenly.
- Add the herbs.
- Place the chuck roast on top of the vegetables and herbs. Cut the roast if necessary to fit them in the pot.
- Add Worcestershire sauce, and beef stock on top to coat the meat. And add the rest of the remaining vegetables, except for the vegetables listed under "To Add After Meat is Cooked."
- Close the lid tightly, and close the vent.
- Press “MEAT” and then “—“ to increase the time to 70 minutes.
- When the timer goes off, release the pressure manually (QR) by opening the vent valve carefully. Normally for meats, you want to release the pressure naturally (NPR) but since you are going to cook again, it's ok to release the pressure quickly for this recipe.
- When the pressure is completely released, open the lid and add the remaining vegetables listed under "To be Added After Meat is Cooked" on top.
- Close and lock the lid, press “MANUAL” or "Pressure Cooker" and set the timer for 5 minutes.
- When the timer goes off, release pressure manually (QR) at 10 minutes.
- Place the meat on a platter and let it rest for 10 minutes before serving.
- Take out the vegetables carefully and serve with the meat as a side.
Notes
Nutrition
➡️ Subscribe to our YouTube Channel for more recipes and tips. And follow @drkarensle on Pinterest, Facebook, Instagram and say "Hello!" 👋
💌 I would love to receive more posts like these in my inbox! SIGN ME UP for FREE newsletters!

