Stuffed cucumber kimchi or oi-so-bagi is a summer kimchi that is easy to make and very quick to ferment. It's one of my favorites since I don't have to wait for months to enjoy it!
Stuffed Cucumber Kimchi Oi-So-Bagi
Cucumbers are growing very nicely in my backyard's container garden. And looking at the fresh cukes reminded me of my daughter's favorite kimchi made with cucumbers called Oi-So-Bagi (oh-yee-soh-bah-gi.)
It is also one of my favorites because it's quick and easy to make and you don't have to wait too long to eat them because they are ready in a day or two, unlike nappa cabbage kimchi. And even though, it doesn't have as many probiotics as regular kimchi, because it ripens quickly, it's still refreshing, tasty, and makes great side dishes with any entreé. I hope you enjoy Stuffed Cucumber Kimchi (Oi-So-Bagi) as much as I do!
Jump to:
Intro
What Is Stuffed Cucumber Kimchi?
Also known as Oi-So-Bagi, stuffed cucumber kimchi is a popular summer recipe in Korea. Oi means cucumber and sobagi means it is stuffed with seasonings. People also traditionally stuff it with vegetables.
And it's fun to make Oi-So-Bagi since you have to stuff the cucumbers with all the goodness with your hands...which is the reason why my daughter loves to make this. She loves playing with food (ahem) and what's better than having fun while making delicious food?
Make sure to wash your hands thoroughly afterward or wear food-safe gloves to handle the spicy peppery mixture for stuffing. You'll thank me later.
Try Oi-So-Bagi instead of pickles. It'll add heat and more flavor to your next meal!
Reuse Old Kimchi Liquid to Make More Cucumber Kimchi
If you loved your first batch of cucumber kimchi, the chances are you'll want to make it again. Here is my short cut trick.
DO NOT THROW OUT the liquid from this batch!
You can reuse it to make a new batch. A slightly different version but still, the 'new' cucumber kimchi will be just as good, if not better! Here is how:
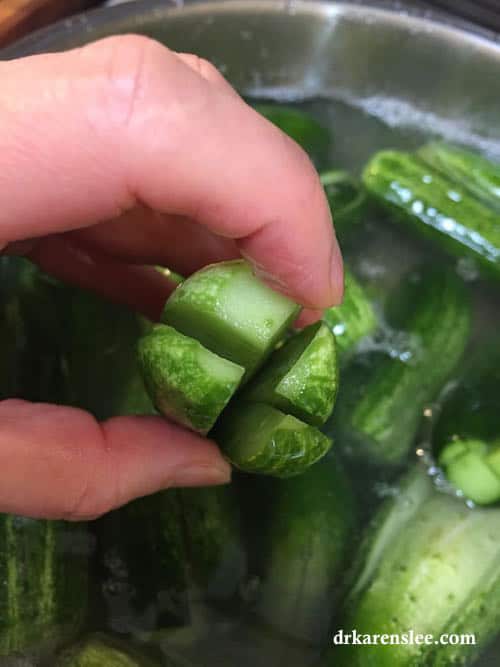
- Cut cucumbers in spears, vertically, like pickles.
- Then, cut into 1-inch cubes. For about 10 cucumbers, sprinkle them with about ½ tablespoon of sea salt and refrigerate for about 30 minutes.
- After 30 minutes, rinse the cukes in cold running water, drain well and dab them with a clean kitchen towel to dry off the excess water.
- Then, add them to the 'old' cucumber kimchi liquid and refrigerate. The 'new' cucumber kimchi will be ready in 24 hours to be eaten. It's like getting a second ferment! Enjoy!
How To Make Stuffed Cucumber Kimchi (Oi-So-Bagi)
The entire recipe is in the printable recipe card at the bottom of this post. First, I have some step-by-step pictures and tips showing you how to make this traditional Korean recipe.
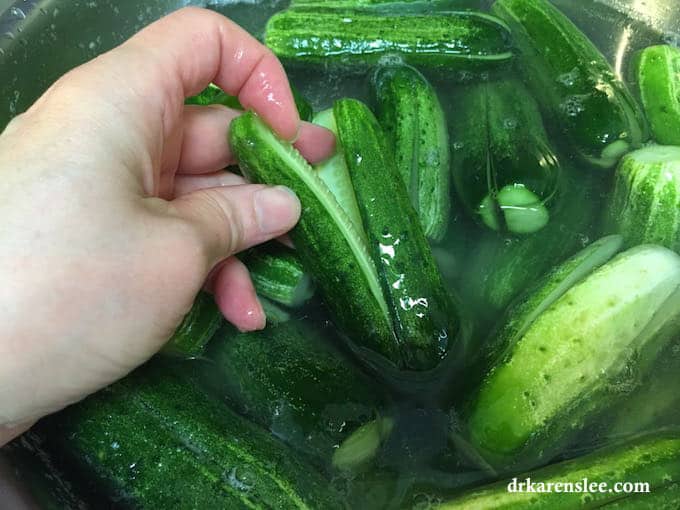
Step 1: Cut The Cucumbers
Cut the cucumbers vertically to prepare them to be stuffed.
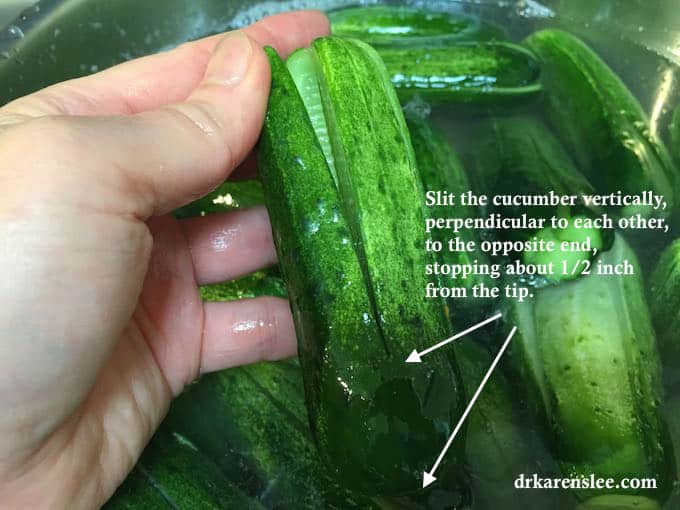
See how it looks after the two vertical slits?
Step 2: Soak The Cucumbers
Then, soak the cukes in a salted brine for about 30- 60 minutes until they are limp.
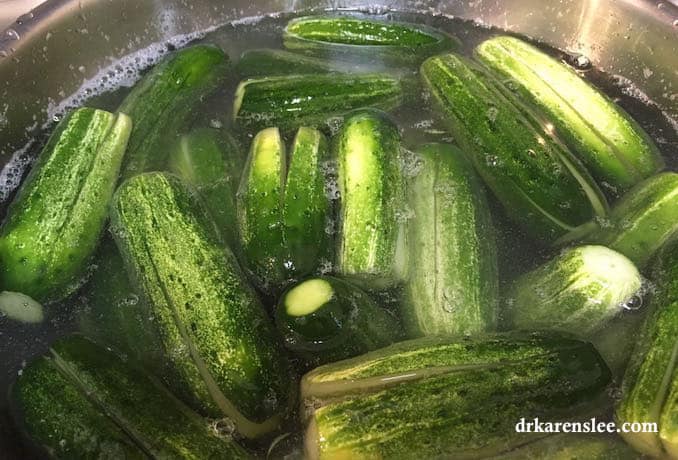
Pull one of the spears away and when it's limp and soft, they are ready to be stuffed!
Step 3: Prepare the Stuffing Mix
Doesn't your mouth water when you see this goodness? So much flavor in this stuffing mix. If you can't find Chinese chives or Korean Chives (the flat greens in the picture below), you can use finely chopped scallions but they won't give you this 'special' flavor but still good enough. You can also try with regular chives, although, I could never find chives that are sold in large quantities.
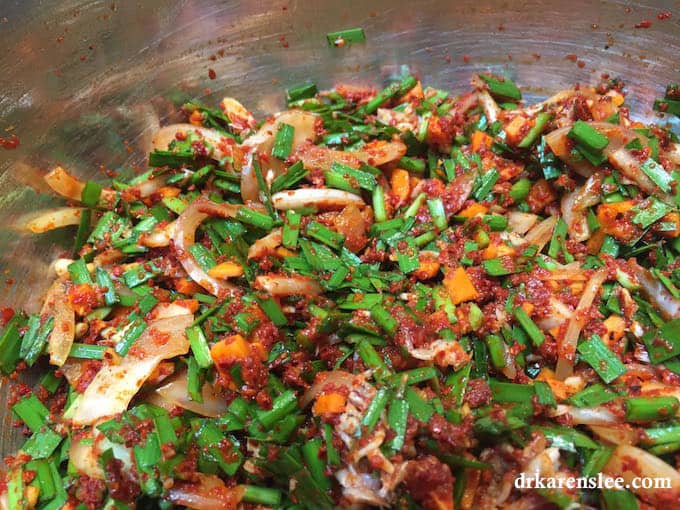
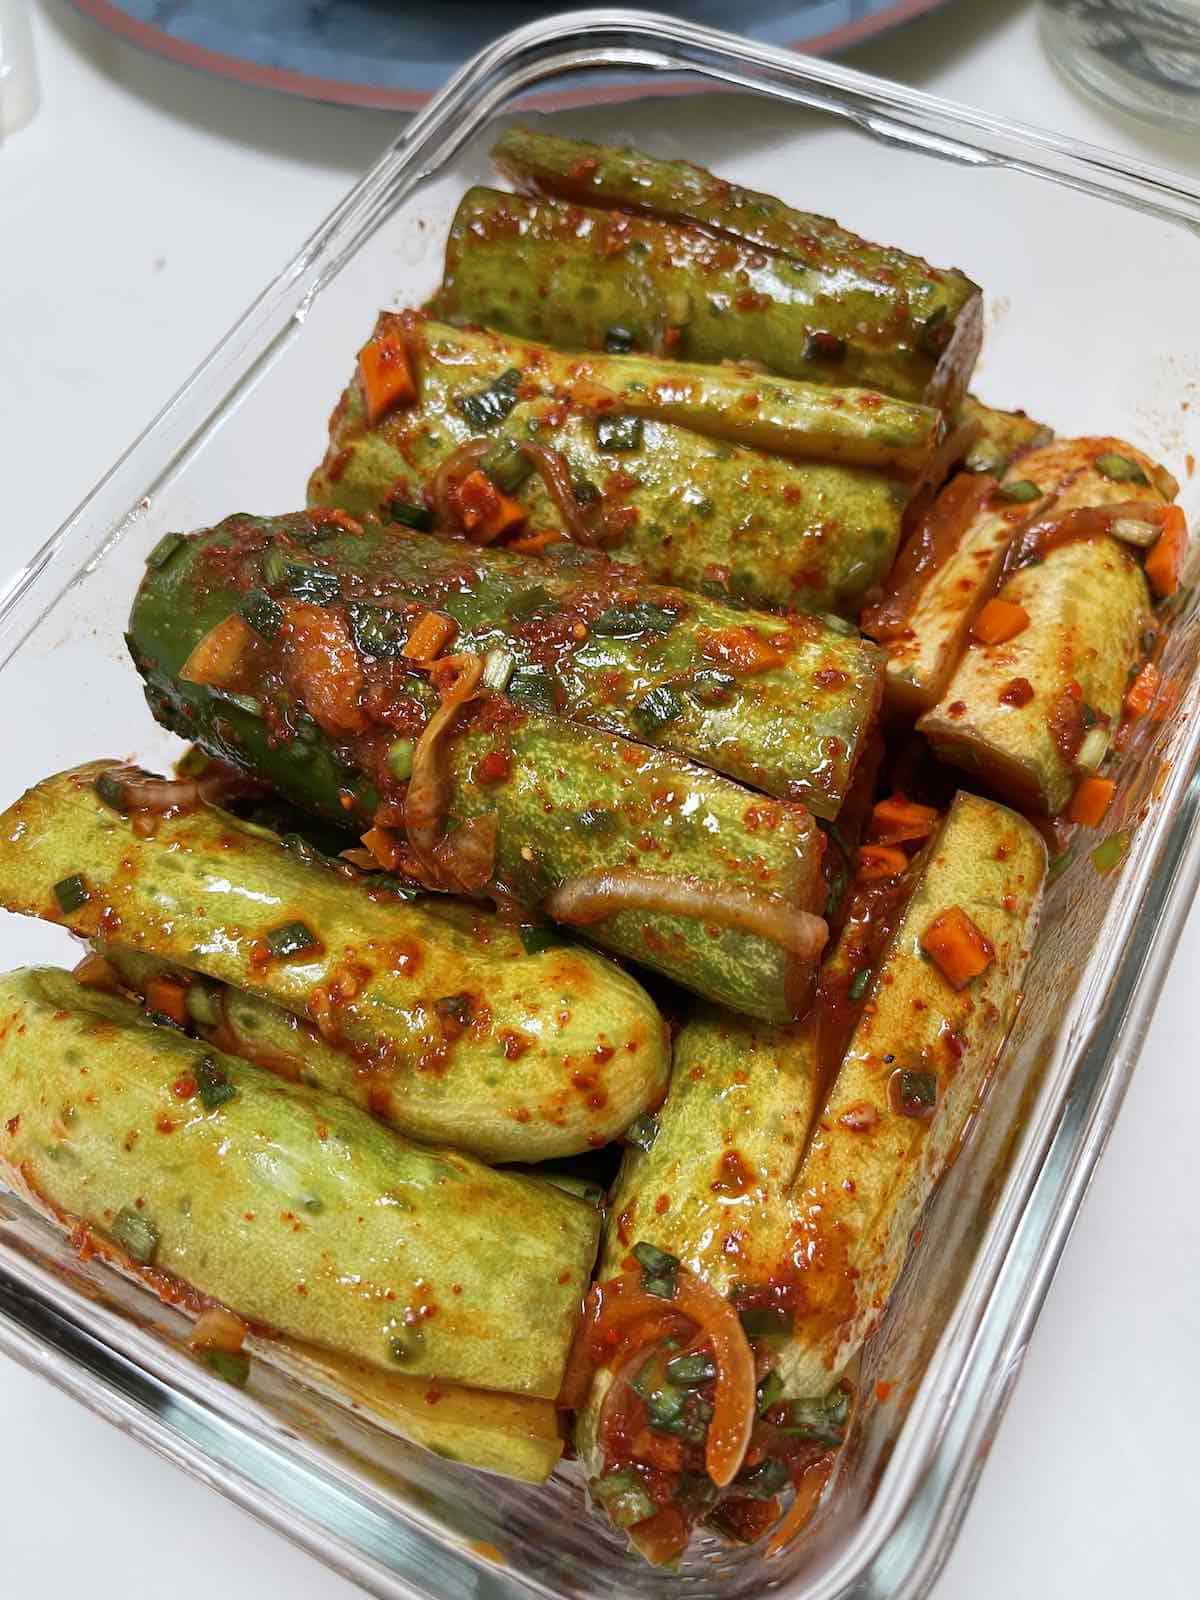
Stuff the cukes liberally inside and smear the mixture on the outside. Massage them well! And after you stuff the cukes, this is what you will end up with! Is your mouth watering?
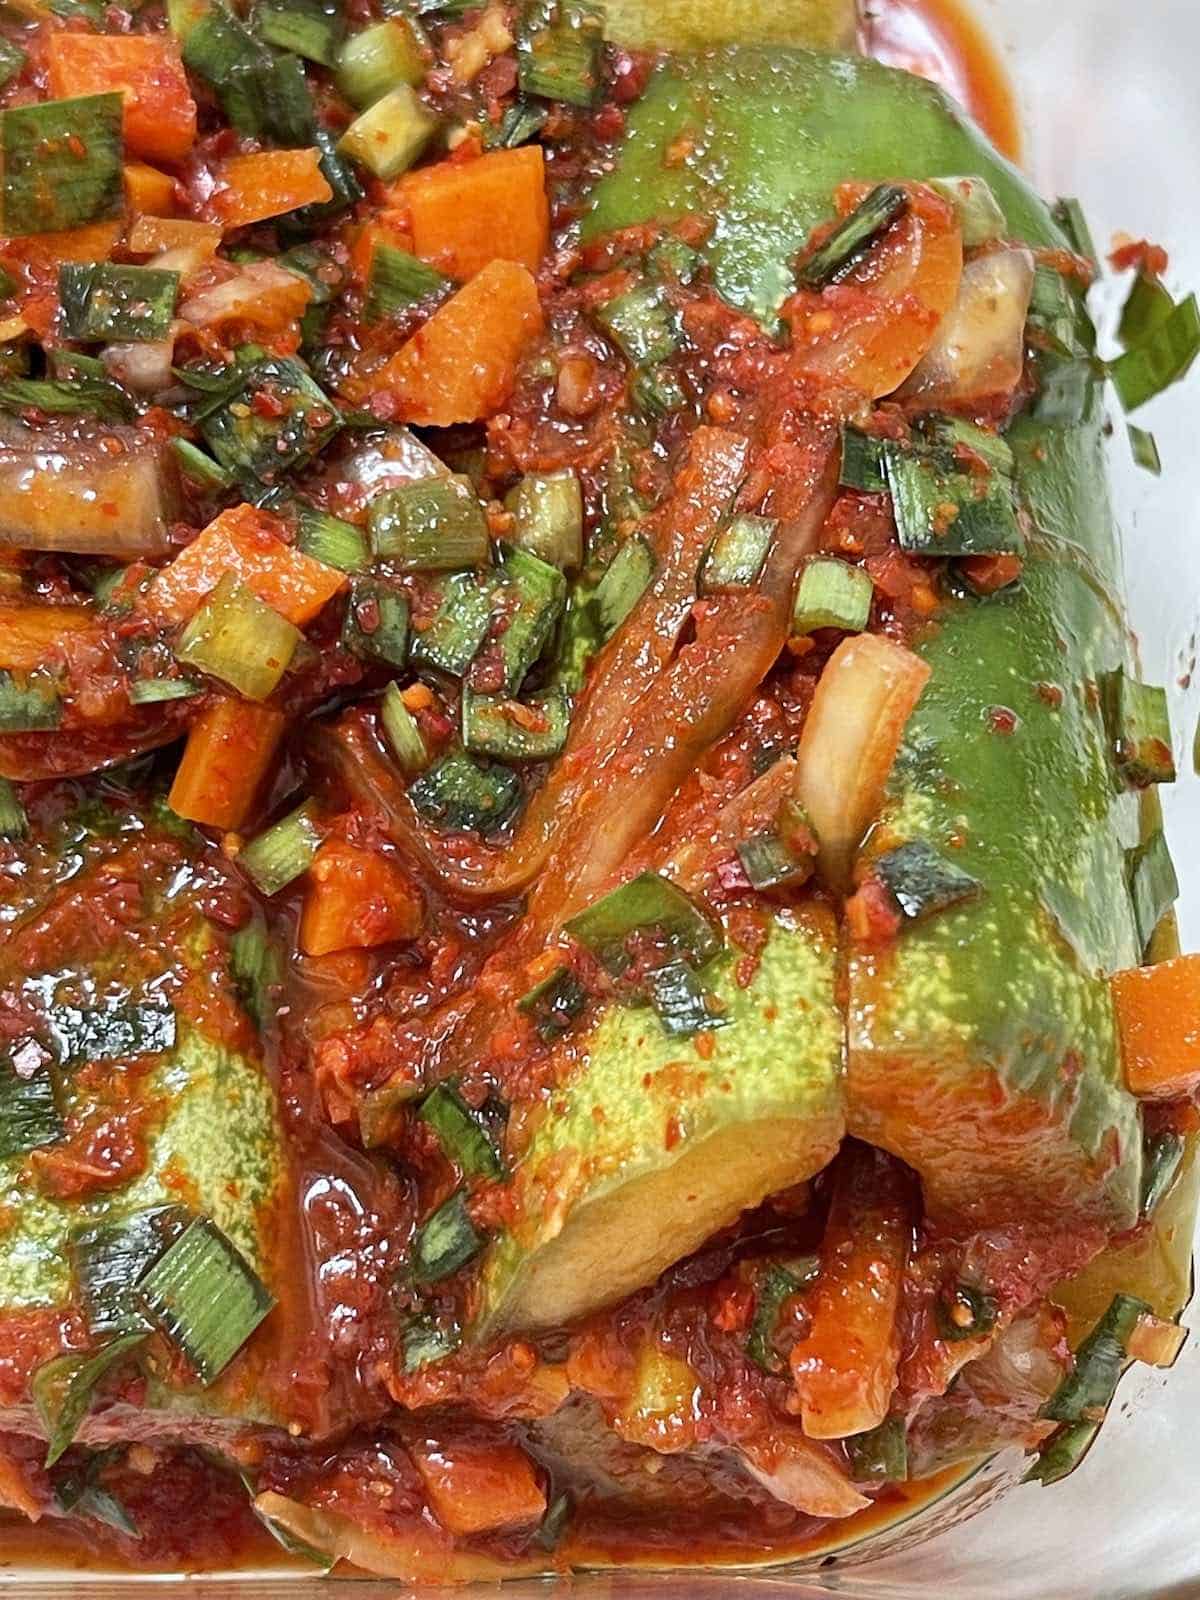
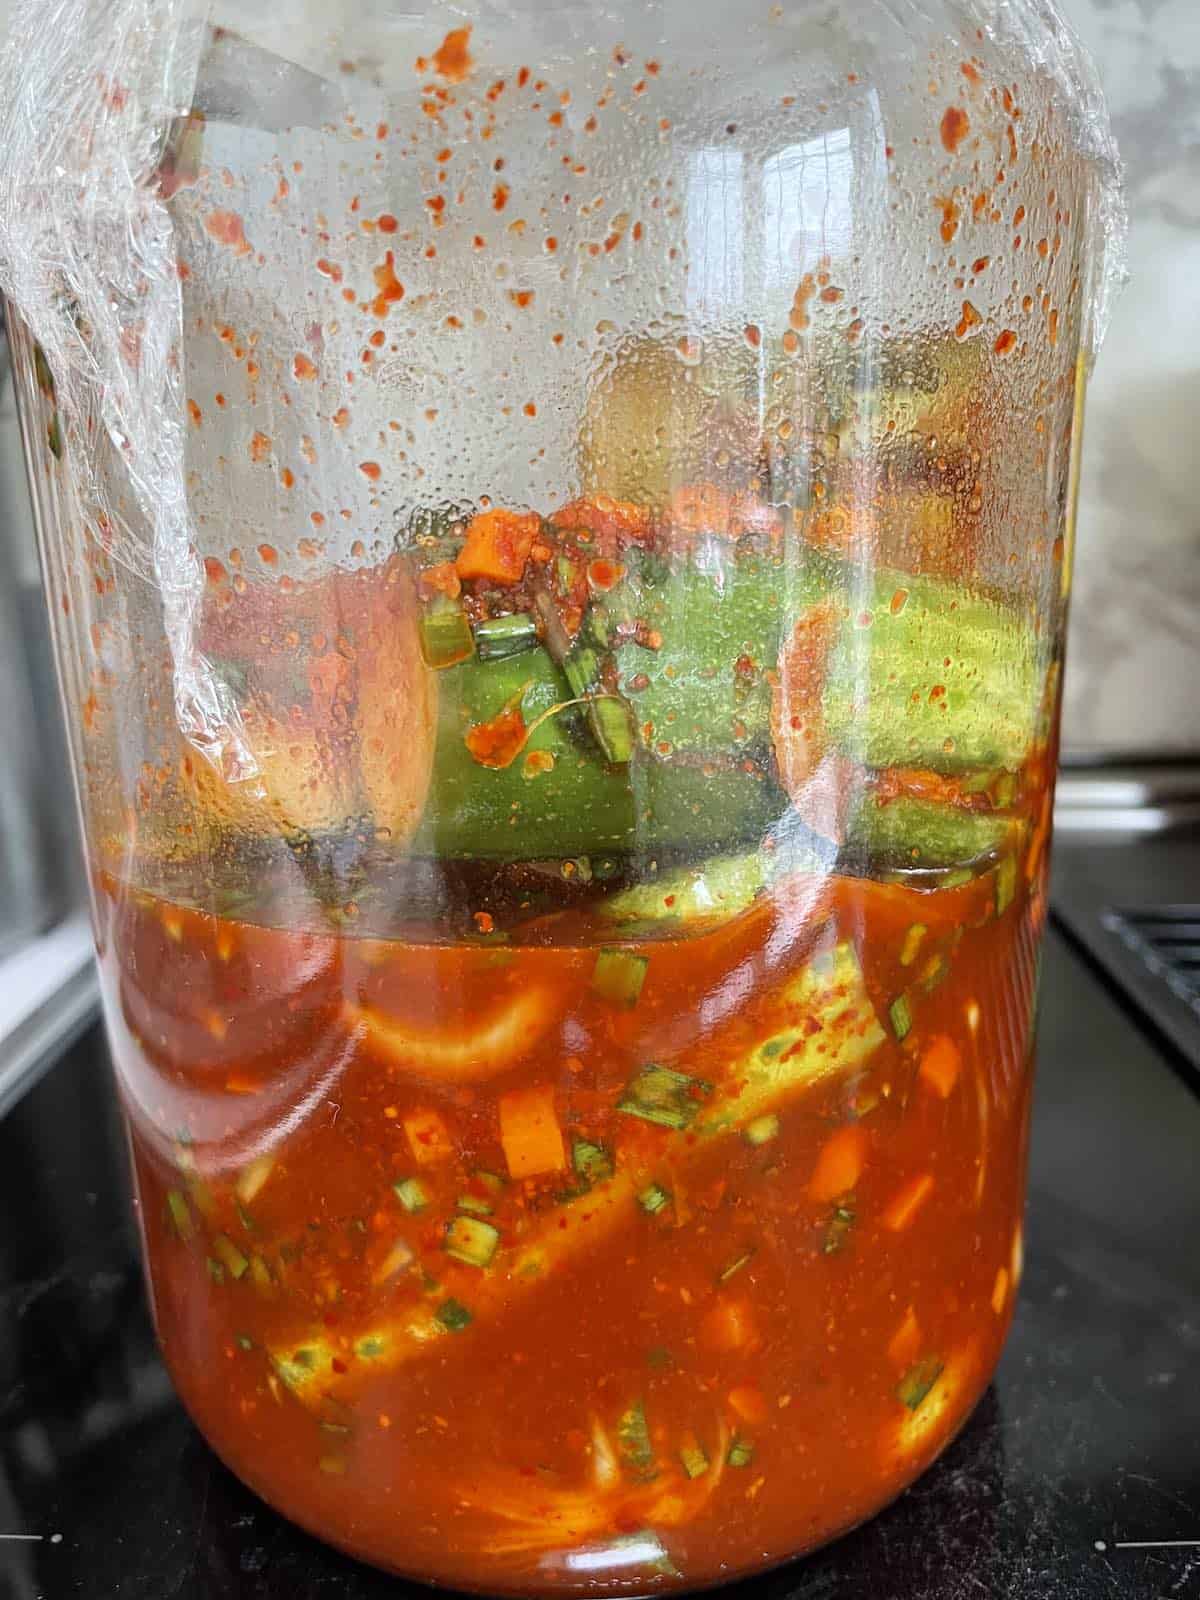
Step 4: Store The Stuffed Cucumbers In A Glass Bowl
Place the stuffed cukes nicely stacked in a large glass bowl, cover it, and leave it out for one day. Then, transfer them to a large glass jar (I have about 6 one gallons jars for making kimchi and kombucha), and place the jar on a plate, just in case the liquid overflows, and refrigerate.
Ingredients
Cucumbers
You can use any variety of cucumbers for this recipe. I love using Korean Cucumbers because that's what I grow in the summer. But you can also use Kirby and English cucumbers but they will be less 'sweet' tasting. The only cucumbers that are not that great are the Persian cucumbers since you they are too small to cut them for the stuffing.
Brine
For the brine, I use coarse sea salt and water.
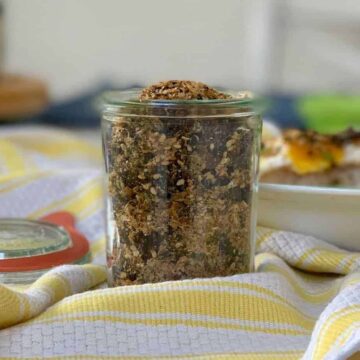
Stuffing
I used traditional stuffing for this recipe. It's a combination of these ingredients:
- Gochugaru – Korean Pepper Flakes. This brand is the only organic gochugaru I found on Amazon. It's grown and harvested in the U.S.!
- Korean chives (NOT Chinese Chives. They are very different)
- Salted fermented shrimp or Korean Fish Sauce (OPTIONAL)
- Sugar - I use organic raw sugar from Costco. You need sugar for fermentation but you can leave out if you wish
- Fresh garlic cloves
- Ginger
- Carrots
- Onions
FAQ
They will be ready for eating in just one to two days after you put them in the refrigerator.
They should stay firm and green for at least a week. But if you wait too long, the cukes will turn yellowish, become too soft and turn sour.
There is nothing wrong with eating sour kimchi (In fact, some Korean dishes require sour kimchi - like, Kimchi Casserole) but cucumbers will get soggy and soft and so I eat them when they are crunchy.
Related Recipes
⭐️ Have you tried this recipe? If you love this recipe, give it "5 star" ⭐️⭐️⭐️⭐️⭐️ rating on the recipe card! We appreciate your feedback!
Recipe

Stuffed Cucumber Kimchi (Oi-So-Bagi)
Equipment
- Clean glass or stainless steel bowl for mixing
- 1 gallon sterilized glass jar with a lid
Ingredients
- 10 Kirby Cucumbers or 3-5 Korean cucumbers, cut in ⅓'s
BRINE
- 10 c water
- 1 c Coarse Sea Salt
STUFFING
- ½ c Gochugaru - Korean Pepper Flakes
- 1 c chopped Korean or Chinese chives chopped into ¼ inch pieces
- ⅓ c salted fermented shrimp or 3 tablespoon of Korean Fish Sauce (optional)
- 1 tablespoon organic raw sugar Need this for the fermentation but you can leave out if you wish
- 6 cloves garlic minced
- 1 teaspoon ginger grated
- 1 c finely chopped carrots
- 1 c thinly sliced onions
- ¾ c brine water
Instructions
- Wash cucumbers well.
- Cut the cucumbers vertically, perpendicularly, stopping about an inch or so before the opposite end.
- Combine sea salt and water in a large glass or stainless steel bow
- Soak the cucumbers in the brine for about 30 minutes or until the spear becomes limp.
- Meanwhile, make the stuffing by combining all the ingredients in a large bowl
- When the cucumbers are limp, you are ready to stuff them.
- Using a clean kitchen towel, dab the excess water from the cucumbers.
- Stuff the cucumbers with the filling, being careful not to pull the spears apart.
- Stack each of the stuffed cucumbers in a large bowl or a glass pan and cover.
- Leave them out for one day in room temperature.
- One day later.....
- Place the cucumbers in a large glass jar, leaving some room on top, and refrigerate.
- Cucumber kimchi will be ready to eat one day AFTER you refrigerate. If the cukes start to turn yellow, it may be get softer and become sour but still, they will be good to eat. Kimchi never goes bad. It just ferments more as you wait longer.
Notes
Nutrition
➡️ Subscribe to our YouTube Channel for more recipes and tips. And follow @drkarensle on Pinterest, Facebook, Instagram and say "Hello!" 👋
💌 I would love to receive more posts like these in my inbox! SIGN ME UP for FREE newsletters!