
Kimchi Pork Fried Rice
Kimchi pork fried rice or kimchi bokkeum bap (김치 볶음밥) cooked in a pressure cooker is the freshest way to make this quintessential Korean dish. You can make the finished rice more crispy afterward or serve it straight from the pressure cooker! Your family will love this all-in-one bowl of exploding flavors and they will request it regularly!
Servings 4
Equipment
- Mealthy Multipot
- Crisp Lid
Ingredients
- 2 tablespoon ghee or butter
- 1-1 ½ c pork belly or pork chop or pork tenderloin cut in ½ inch pieces
- 1 tablespoon gochugaru optional or use more if needed
- 1 c chopped onion
- 4 cloves garlic minced
- 1 c aged kimchi chopped
- 2 c uncooked short or medium grain rice washed, soaked for an hour, and drained
- 1 teaspoon sea salt
- ½ teaspoon fresh black pepper
- ¾ c kimchi liquid
- 1 c chicken broth
- 4 eggs see below how and when to cook them
Garnish
- ¼ c finely chopped scallions for garnish
- ½ teaspoon toasted sesame seeds for garnish
- ½ teaspoon black sesame seeds for garnish optional
- 1 sheet gim or nori cut in thin strips for garnish
Crispy Rice in Pan
- 2 tsp sesame oil
- 1 tablespoon avocado oil for pan frying the eggs
Instructions
- Turn on the Mealthy Multipot by pressing the "Sauté" and add butter or ghee and the pork to the inner pot. Sauté until the pork starts to turn brown.
- Add gochugaru, if using, and onion to the inner pot and continue to stir until pork becomes brown and onion becomes translucent.
- Add sliced kimchi to the inner pot and continue to stir.
- Add the washed, soaked and uncooked rice. Add the kimchi liquid and chicken broth. Pat down the rice with a spoon just so that it's submerged in the liquid but do NOT stir too much.

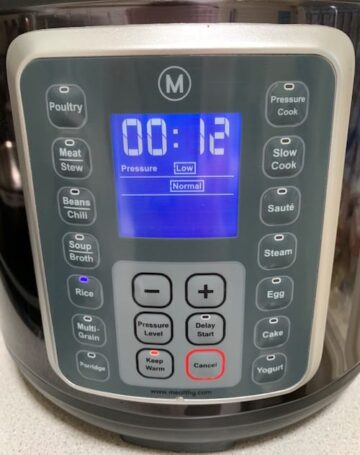
- Close the lid tightly, and press the "Rice" button.
- If you want to eat the fried rice when it's done without making it crispy, this is the time to cook the eggs on a pan as your desire doneness. While the sunny side up with runny yolk is perfect for this recipe, scrambled eggs is fine as I used to use in college. You can scramble the eggs and mix it in when serving. Set the eggs aside and add to the rice before serving.
- When the timer is finished, you will hear a beeping sound. Turn the steam vent handle to "Venting" to allow the steam to escape. When the red float valve drops down, open the lid carefully.
- Stir the ingredients in the inner pot well. You are ready to eat. But if you want to make the rice crispy, follow the options below.

Crisp Lid
- Transfer the rice mixture into the stainless steel basket that came with the Multipot. Pat down the top of the rice a little, and create small craters on top for the eggs. Rinse the inner pot and insert it back in the Multipot. Place the trivet that came with the Multipot inside the inner pot. Put the basket with the rice on top of the trivet. DO NOT put water in the inner pot since you’ll be using the Crisp Lid and not the Multipot.
- Place the Crisp Lid on top of the Multipot. Plug in the lid, and lower the handle until you hear the click sound. Set the temperature at 400 degrees and timer at 4 minutes. Press “Start” – the triangle icon button. When the timer ends, carefully lift the Crisp Lid and place it on the silicone mat. It’s very hot, so be careful. Gently crack the eggs in the craters on top of the rice. Place the Crisp Lid back on the Multipot and press the Start button again. The temperature and time should still be 400 degrees and 4 minutes.
- Check the rice through the top of the glass to make sure the eggs are not being overcooked. When the eggs are cooked as your desired doneness, lift the lid off the Multipot and place it on the silicone mat. Take out the basket carefully and plate the rice into bowls with the eggs without breaking the yolks. Garnish with toasted sesame seeds, seaweed strips, scallions and serve immediately.
In The Pan or Skillet
- Cook the sunny side up eggs in a pan or a skillet and set aside to use later. Add 2 teaspoon of sesame oil to the same pan and sauté the Kimchi Pork Fried Rice until the bottom of the rice gets crispy. Stir occasionally, so the rice doesn’t burn. Evaporating extra moisture and making the bottom crispy or crusty is what you’re aiming for so don’t over mix. I love using a deep pan, like the Mealthy’s pan pictured below because of the almost 2.5″ depth. It’s perfect for making rice dishes like this.
- After sautéing for 3-5 minutes, the rice should be less soggy and crispy on the bottom. Plate the rice into bowls, top them with the eggs you prepared. Garnish with toasted sesame seeds, strips of seaweed, scallions and serve immediately.
Notes
Original – As I mentioned above, original Kimchi Fried Rice I used to make in college is perfectly fine just with kimchi and rice. You can’t go wrong if you don’t add any animal protein and just use the two original ingredients. Make sure to try my easy simplified kimchi recipe . You can use store-bought kimchi but make sure to age it by leaving it out on the counter for a few days until it’s sour.
Pork – pork belly, pork chop, tenderloin or even ground pork will do.
Beef – thin slices of strip steak or chuck works well.
Shrimp – wild caught shrimp will be perfect for adding seafood flavor.
Squid – another great option if you want seafood flavor.
Bacon – because, BACON!
Tofu – if you don't want animal protein, sprouted organic tofu is perfect to add before serving.
Cheese – if you can tolerate dairy, try topping it with melty cheese like, cheddar or mozzarella. It works surprisingly well with spicy food like this.